The current implementation of service detection focusses on containers.
However when using Docker Swarm this limits automatic service detection
to the containers running on the same node as homepage (or
docker-proxy). Detecting other services in the docker swarm is with the
current implementation not possible.

This commit fixes this by getting the appropriate labels from services
when Docker swarm is configured in the config file. This ensures that
the appropriate labels are gathered from the service definition instead
of the container definiation, thus allowing for automatic service
detection for the entire Docker swarm. Please note that in order for
this to function the homepage (or dockerproxy) should be running on a
manager node. Only the manager node is able to gather all the relevant
service labels.

Fixes: #752, #970, #955, #1255, #1045, #1496

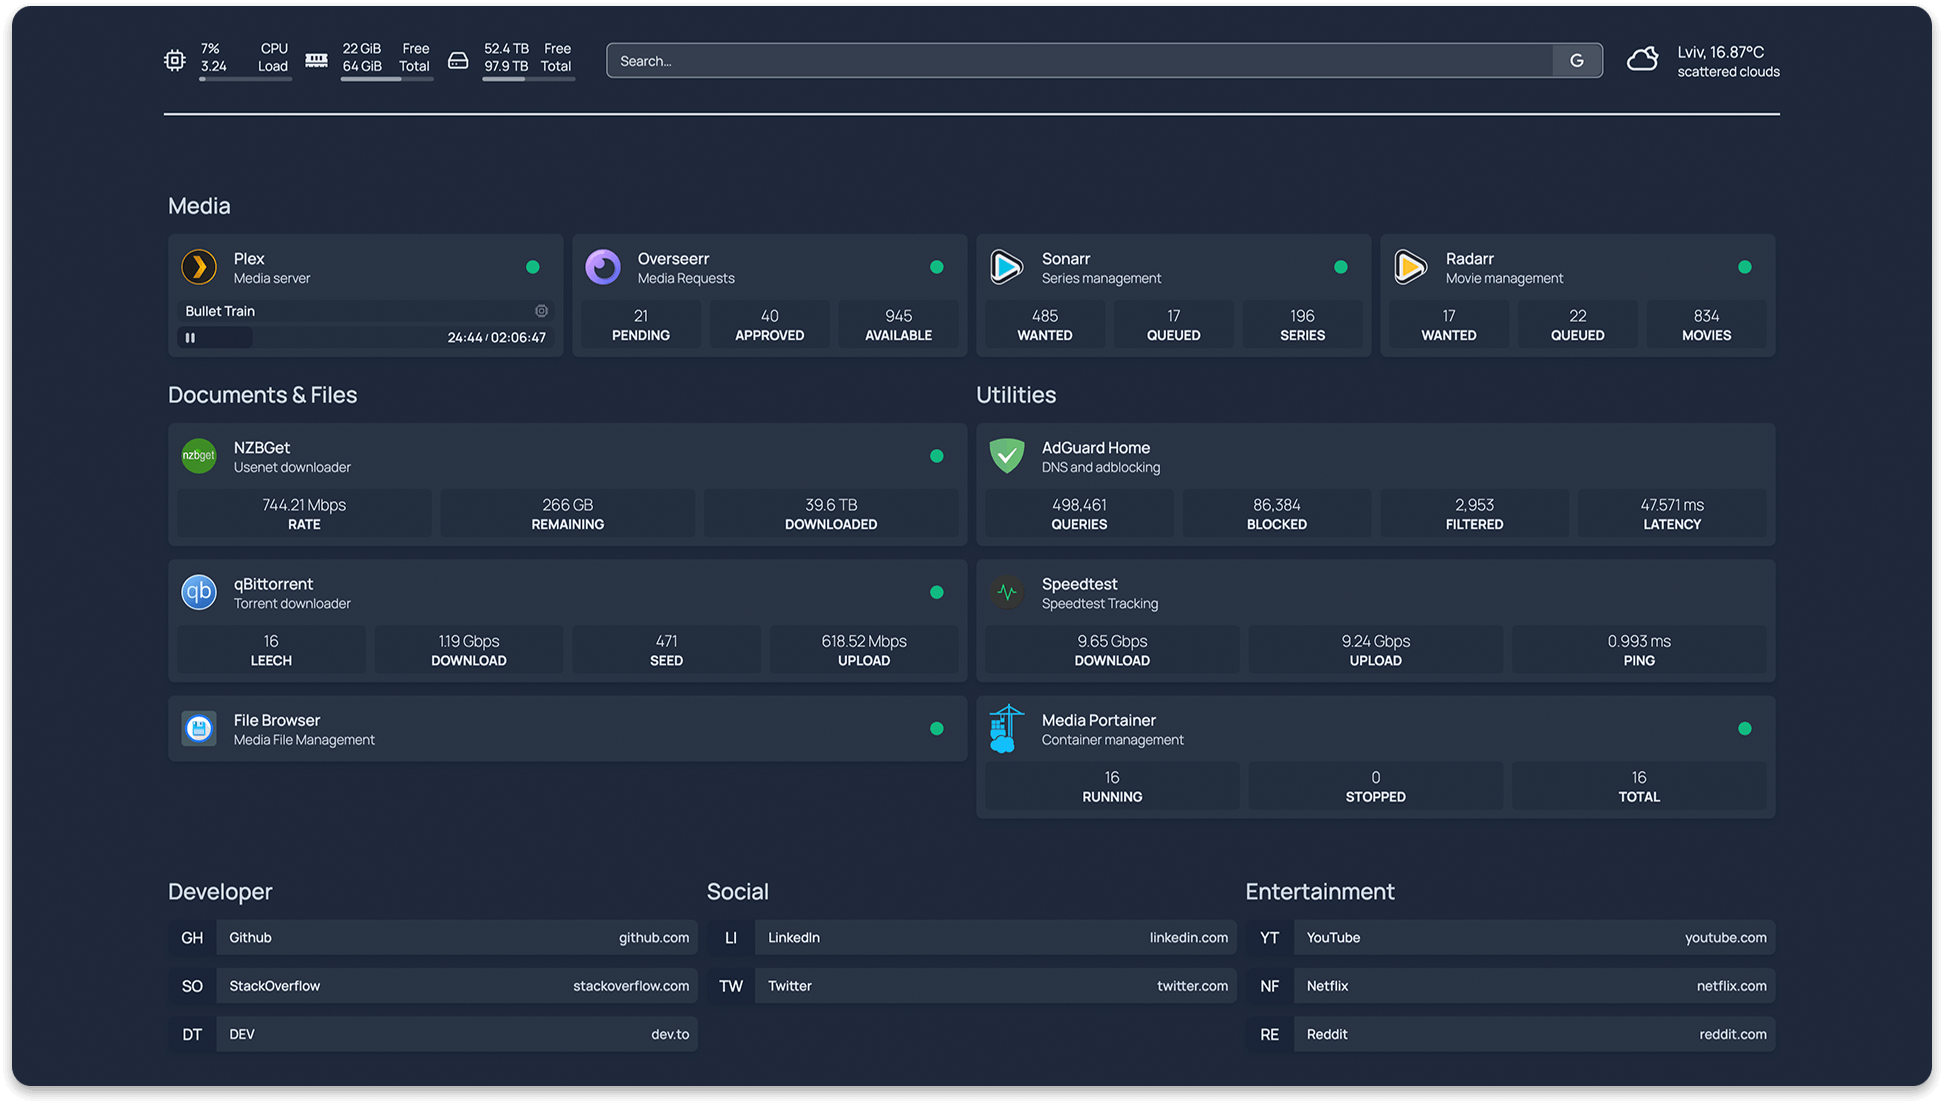
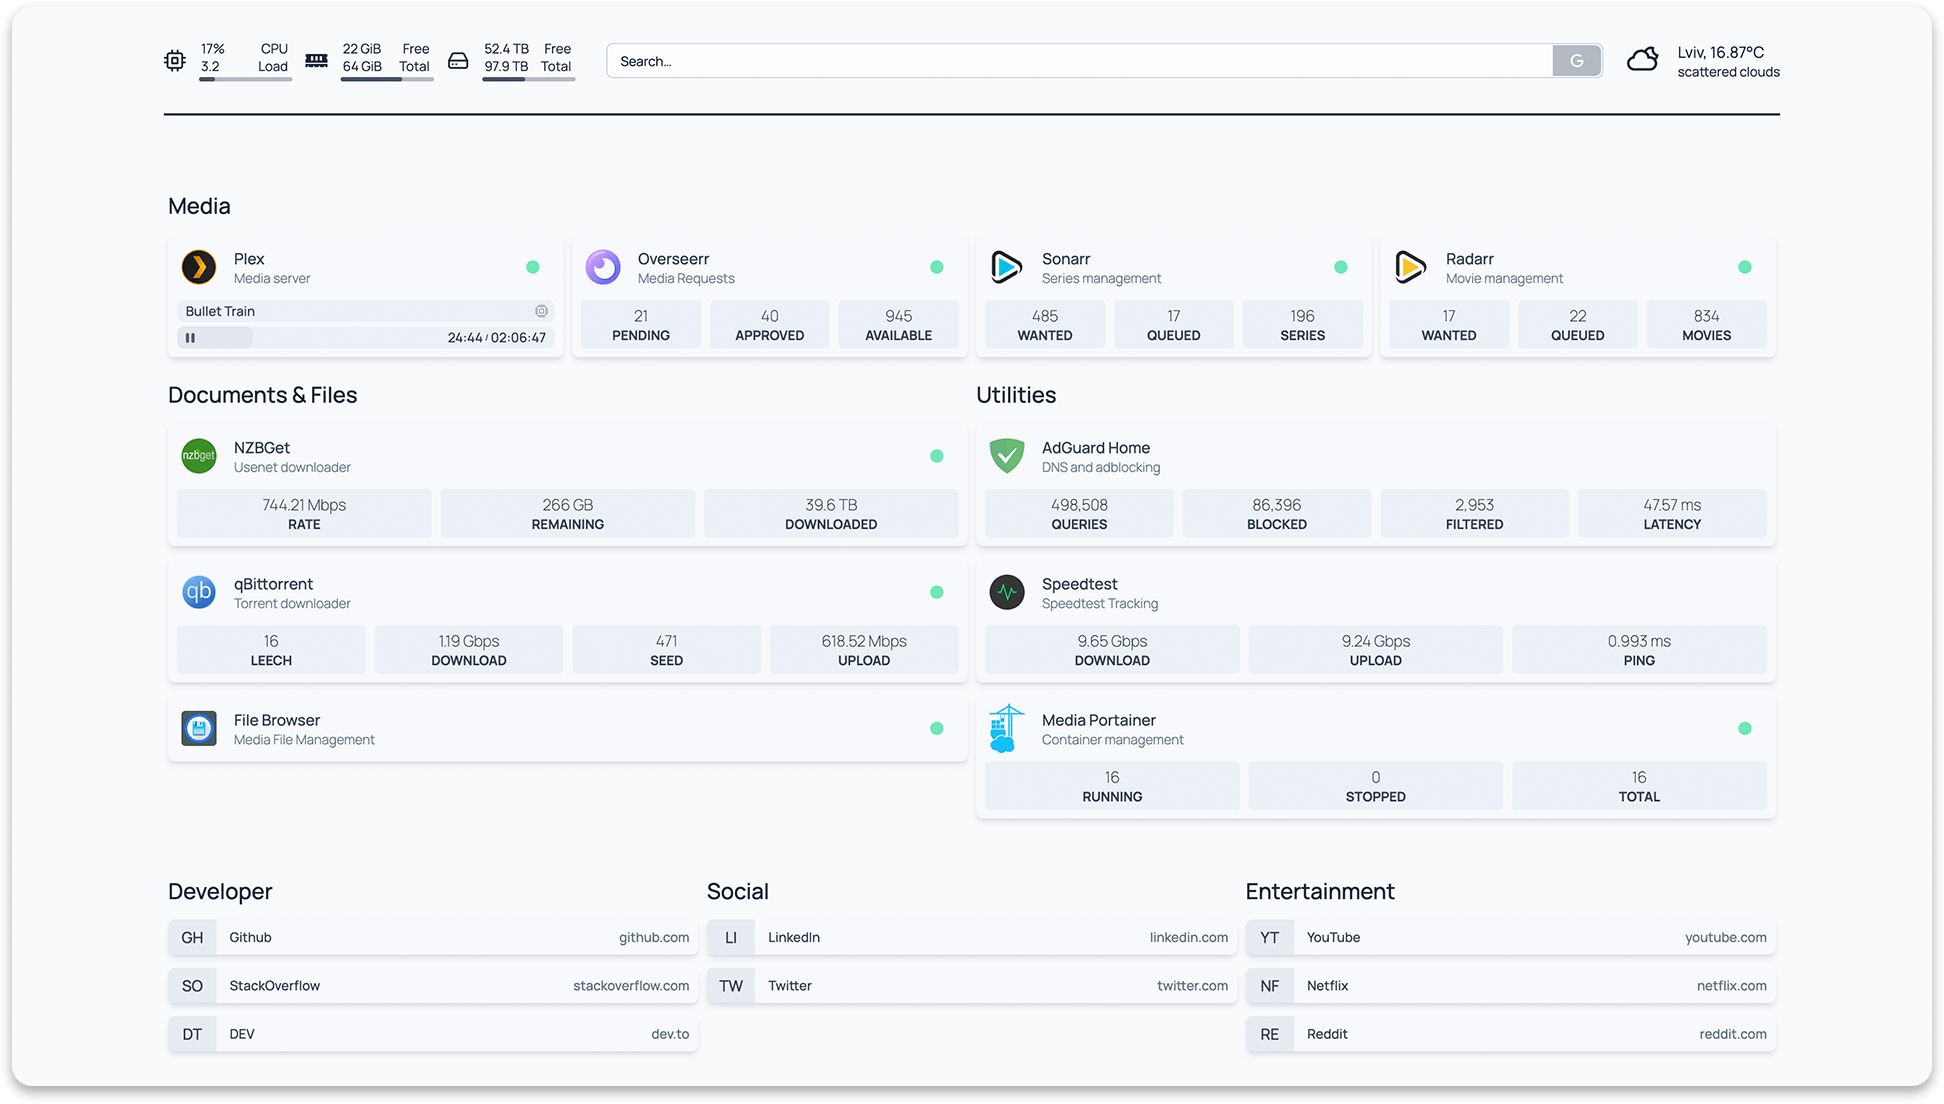
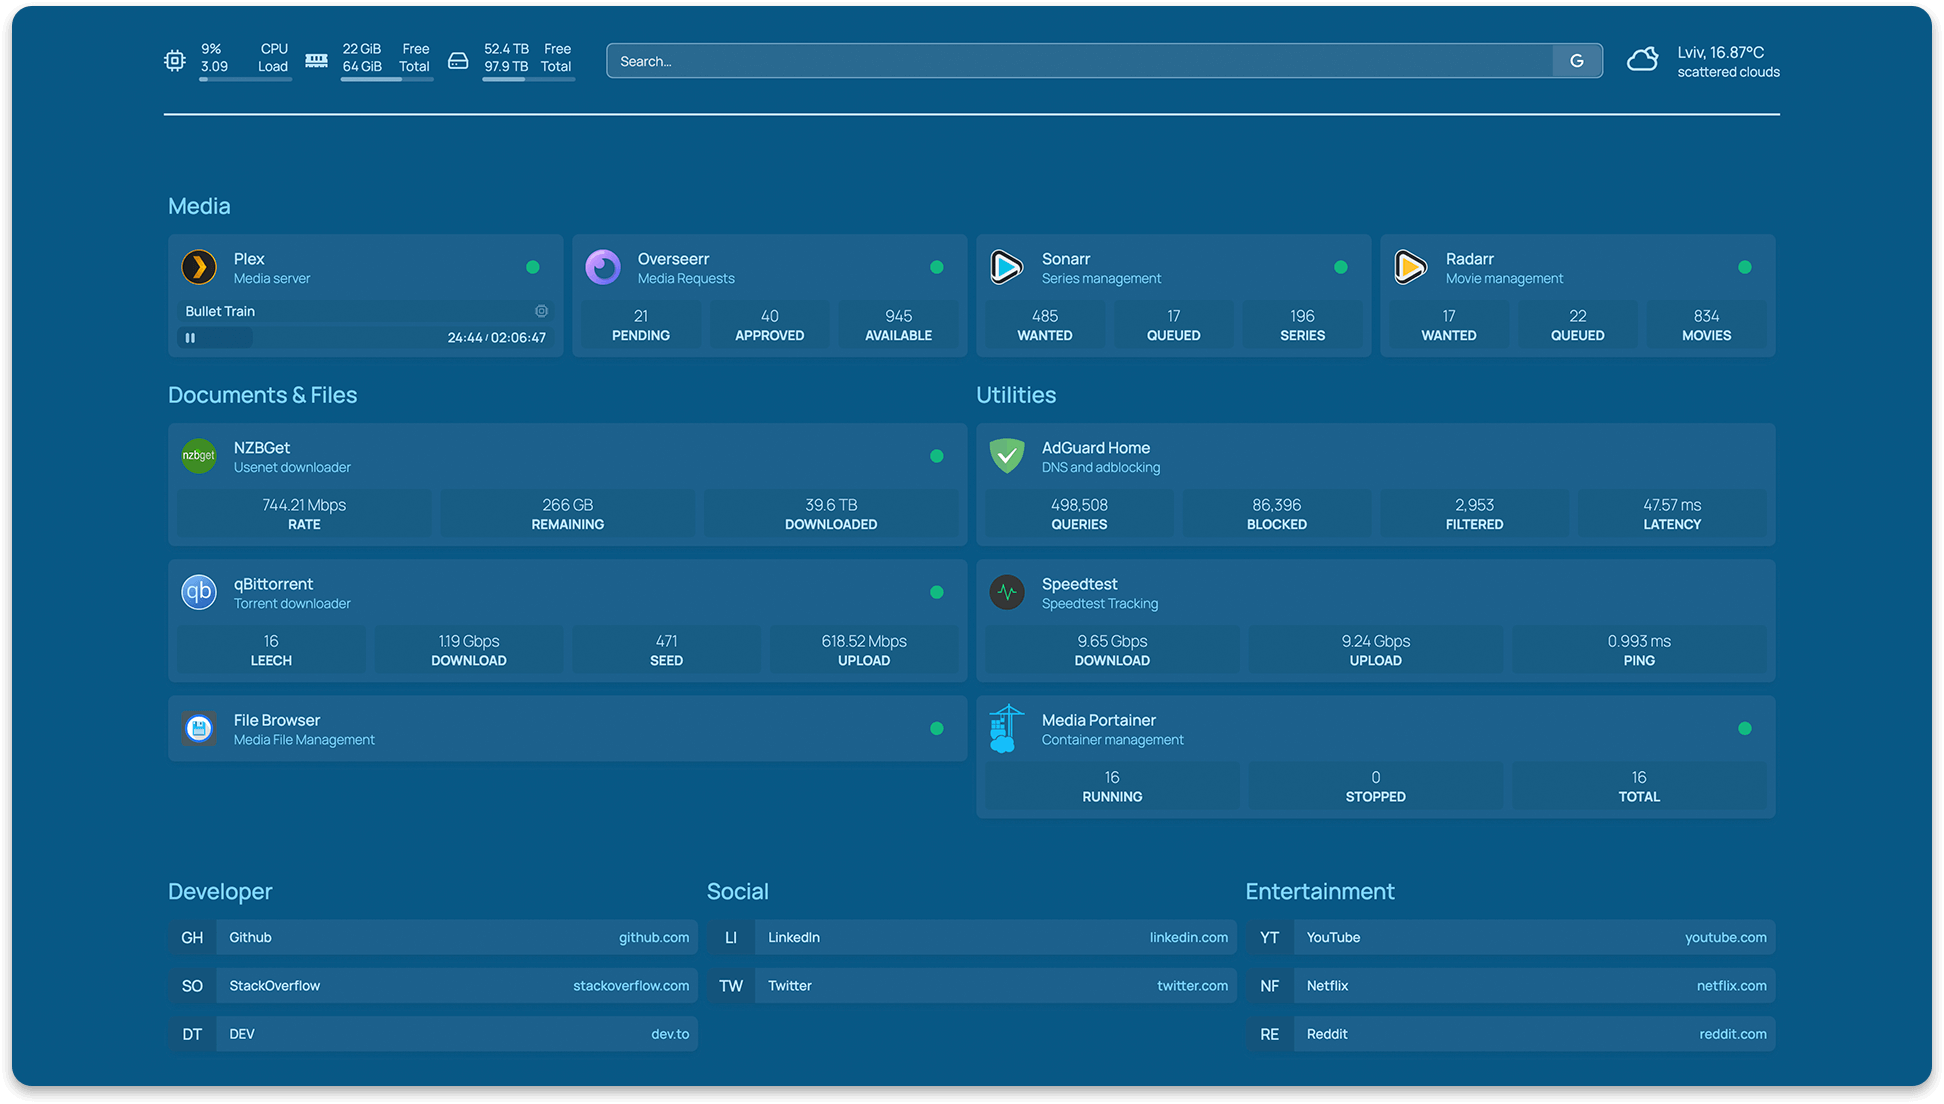
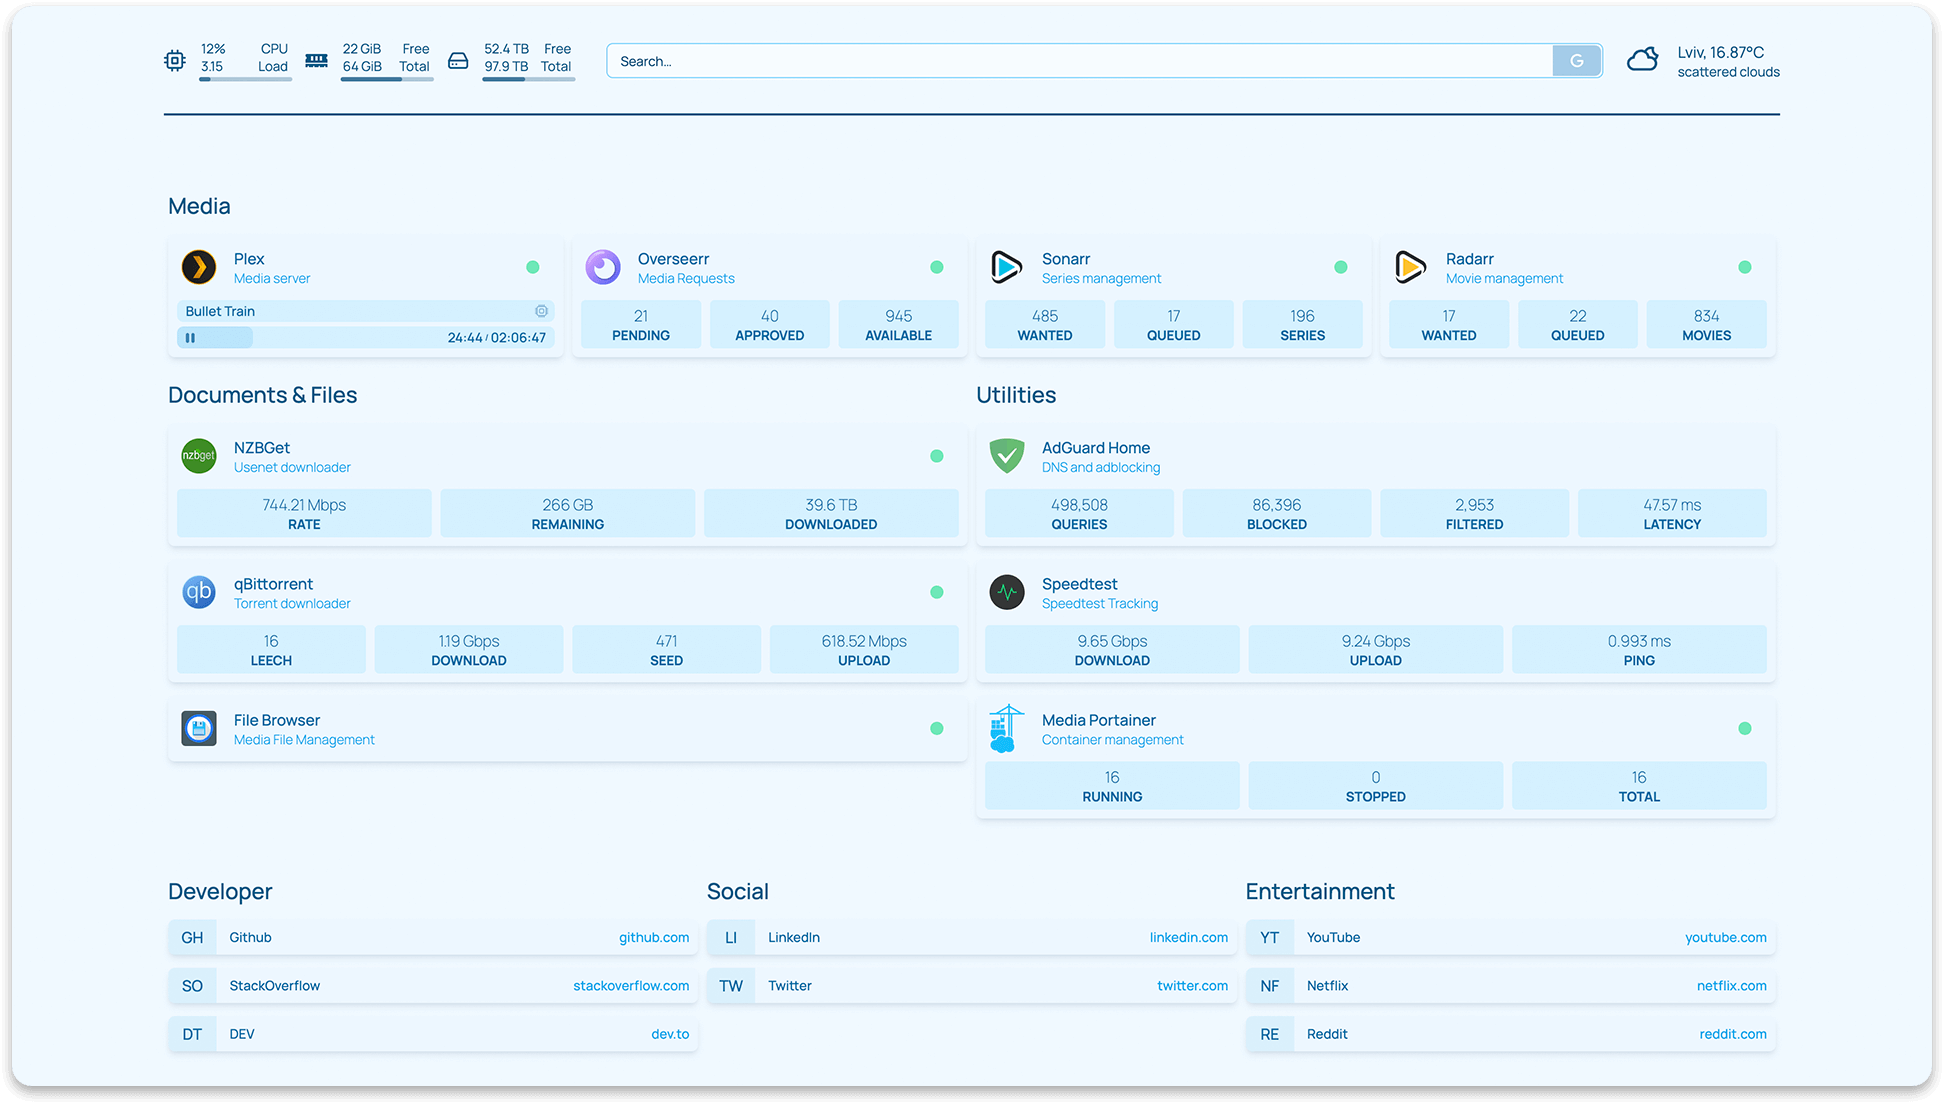
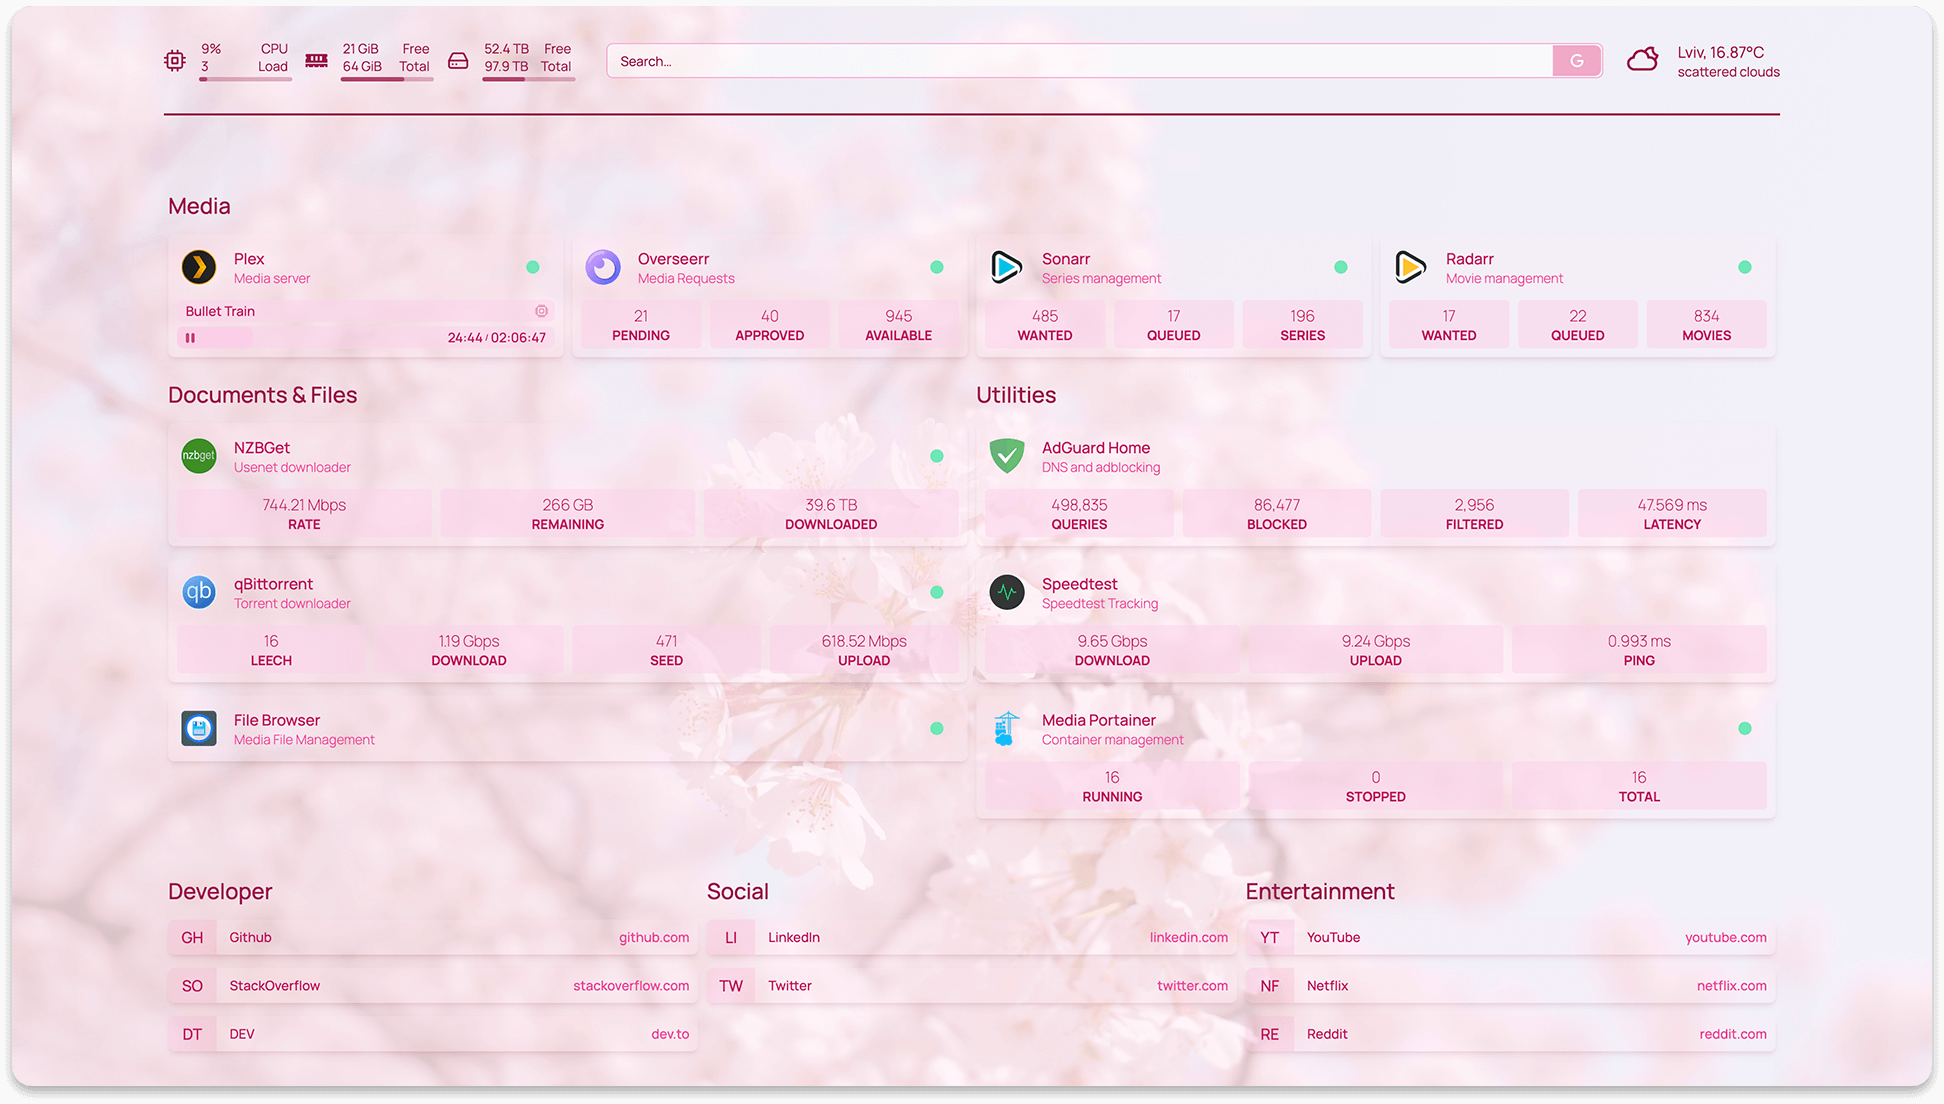
A modern (fully static, fast), secure (fully proxied), highly customizable application dashboard with integrations for more than 25 services and translations for over 15 languages. Easily configured via YAML files (or discovery via docker labels).

![]()
![]()
Features
- Fast! The entire site is statically generated at build time, so you can expect instant load times
- Secure! Every API request to backend services goes through a proxy server, so your API keys are never exposed to the frontend client.
- Images built for AMD64 (x86_64), ARM64, ARMv7 and ARMv6
- Supports all Raspberry Pi's, most SBCs & Apple Silicon
- Full i18n support with translations for Catalan, Chinese, Dutch, Finnish, French, German, Hebrew, Hungarian, Malay, Norwegian Bokmål, Polish, Portuguese, Portuguese (Brazil), Romanian, Russian, Spanish, Swedish and Yue
- Want to help translate? Join the Weblate project
- Service & Web Bookmarks
- Docker Integration
- Container status (Running / Stopped) & statistics (CPU, Memory, Network)
- Automatic service discovery (via labels)
- Service Integration
- Sonarr, Radarr, Readarr, Prowlarr, Bazarr, Lidarr, Emby, Jellyfin, Tautulli, Plex and more
- Ombi, Overseerr, Jellyseerr, Jackett, NZBGet, SABnzbd, ruTorrent, Transmission, qBittorrent and more
- Portainer, Traefik, Speedtest Tracker, PiHole, AdGuard Home, Nginx Proxy Manager, Gotify, Syncthing Relay Server, Authentik, Proxmox and more
- Information Providers
- Coin Market Cap, Mastodon and more
- Information & Utility Widgets
- System Stats (Disk, CPU, Memory)
- Weather via OpenWeatherMap or Open-Meteo
- Web Search Bar
- UniFi Console, Glances and more
- Instant "Quick-launch" search
- Customizable
- 21 theme colors with light and dark mode support
- Background image support
- Column and Row layout options
Support & Suggestions
If you have any questions, suggestions, or general issues, please start a discussion on the Discussions page.
For bug reports, please open an issue on the Issues page.
Getting Started
For configuration options, examples and more, please check out the homepage site.
With Docker
Using docker compose:
version: "3.3"
services:
  homepage:
    image: ghcr.io/benphelps/homepage:latest
    container_name: homepage
    ports:
      - 3000:3000
    volumes:
      - /path/to/config:/app/config # Make sure your local config directory exists
      - /var/run/docker.sock:/var/run/docker.sock:ro # (optional) For docker integrations
or docker run:
docker run -p 3000:3000 -v /path/to/config:/app/config -v /var/run/docker.sock:/var/run/docker.sock ghcr.io/benphelps/homepage:latest
With Node
First, clone the repository:
git clone https://github.com/benphelps/homepage.git
Then install dependencies and build the production bundle (I'm using pnpm here, you can use npm or yarn if you like):
pnpm install
pnpm build
If this is your first time starting, copy the src/skeleton directory to config/ to populate initial example config files.
Finally, run the server:
pnpm start
Configuration
Configuration files will be generated and placed on the first request.
Configuration is done in the /config directory using .yaml files. Refer to each config for the specific configuration options.
You may also check the homepage site for detailed configuration instructions, examples and more.
Development
Install NPM packages, this project uses pnpm (and so should you!):
pnpm install
Start the development server:
pnpm dev
Open http://localhost:3000 to start.
This is a Next.js application, see their doucmentation for more information:
Contributors
![]()